


OpenGameTools
OGT is a compilation of several systems, scripts and extensions aiming to be a lightweight ‘framework’. We, as a team, use this asset every day on production apps and games. The UI system alone has -collectively- being used for more than 800k users on those apps and games.
Check the Documentation for more details.
Tech things - TLDR
• The UI system focuses on easy to use and performance, self managed instantiation, canvases, sorting layers, etc.
• An ScriptableObject architecture and event system, the core of the asset. Based on Ryan Hipple’s 2017 Unite talk and Richard Fine’s 2016 Unite talk
• Event System compatible with ScriptableObjects and MonoBehaviours on runtime
• Hundreds of C# Extensions
• Many Scripts and Components to use and “extend” Unity.
Why would I want to use this?
We use this asset as a framework and as a base on every project, feel free to try it, its free.
Do you like this asset?
Consider supporting us on Github Sponsors - Patreon
Features
Managed Runtime extensions
Smart and self managed Coroutines
ActionAfterFrame
void MyMethod()
{
    this.ActionAfterFrame(DelayedMethod);
}

void DelayedMethod()
{
    Debug.Log("This is printed in the next frame");
}
Why? This is a managed, uninterrupted coroutine. For example, if a GameObject is disabled or destroyed, coroutines may break in many ways. This prevents that.
ActionAfterSeconds
void MyMethod()
{
    this.ActionAfterSeconds(1.5f, DelayedMethod);
}

void DelayedMethod()
{
    Debug.Log("This is printed after 1.5 seconds.");
}
ActionAfterCondition
void MyMethod()
{
    this.ActionAfterCondition(IsMyGameCondition, DelayedMethod);
}

bool IsMyGameCondition()
{
    return m_gameReady && m_playerReady;
}

void DelayedMethod()
{
    Debug.Log("This is printed after the condition is met.");
}
More tools and info in /Documentation/Runtime.md
UI Management
One line and ready to run:
private UIMainMenu m_uiMainMenu = null;
private const string kUIMainMenu = "UIMainMenu";

void OnSceneLoad()
{
    // All TryXX() return null if the logic is not met.
    if (!UIRuntime.TryCreateWindow(kUIMainMenu, out m_uiMainMenu))
        return;

    // Show the Window using the Procedural UI Animations.
    m_uiMainMenu.AnimatedShow();

    m_uiMainMenu.CustomLogic();
}
Setup - How to register UI elements
> Just a few steps: 1. Make your Window script anywhere you like. Use any of the Base Window elements, such as `UIWindow`, `UITabWindow`, etc. 2. Make a prefab out of your Window script. 3. Select the `"UIGameResources"` asset on `"/CoreUI/Resources"` or use the `"OGT/Module Resources/Select UI"` menu item on the top the editor. 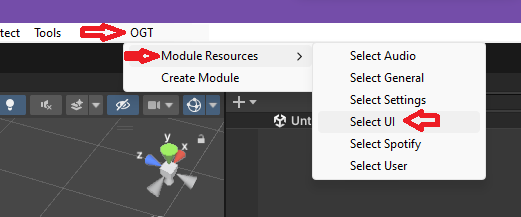 4. Add your Window Prefab to the UIWindows list. 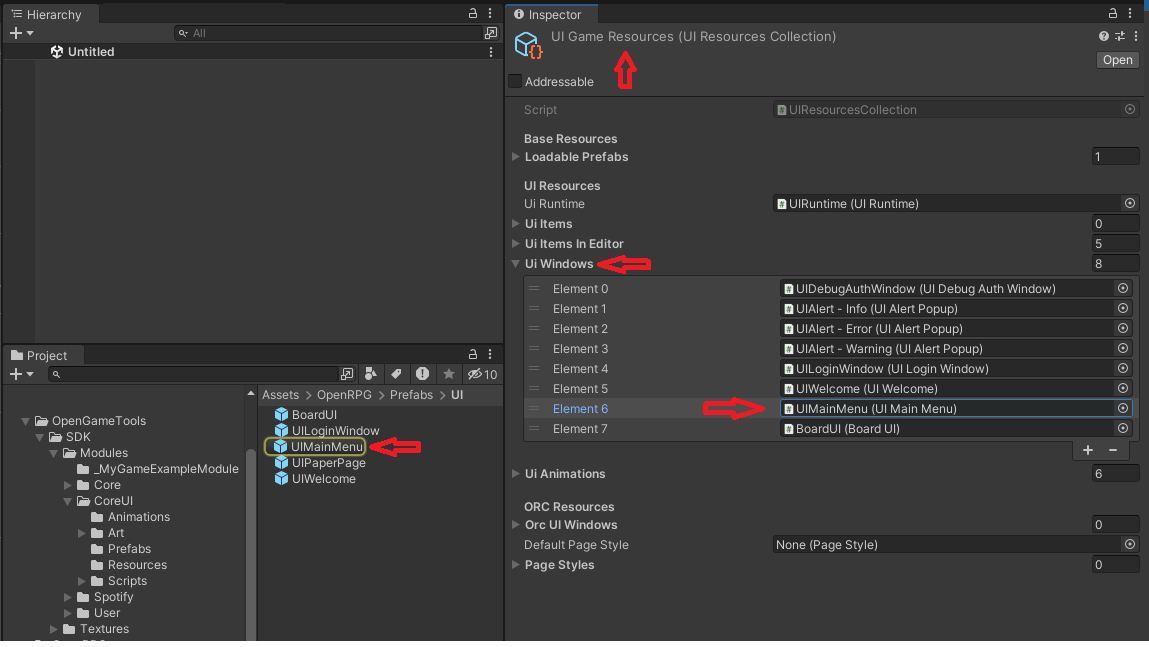 5. That's it. Go and use your new window. > More info: [/Documentation/**UIResources.md**](https://github.com/OpenDNDApps/OpenGameTools/tree/master/Documentation)
UI Animations
No code needed.
With procedural animations stored in ScriptableObjects the UIAnimation system can be extended and customized in any way you may need, just change the parameters on each animation file as you see fit.
Here we can see a UITabWindow, with 4 different animations. A ScaleInFadeIn to show, ScaleOutFadeOut to hide, and each tab with FadeIn and FadeOut.
Multiple animations in different elements.
Sibling related animations.
Mouse/Touch event animations.
Multiple animations.

How it works? - How to customize
Each animation is a file. For example here is `FadeIn`. 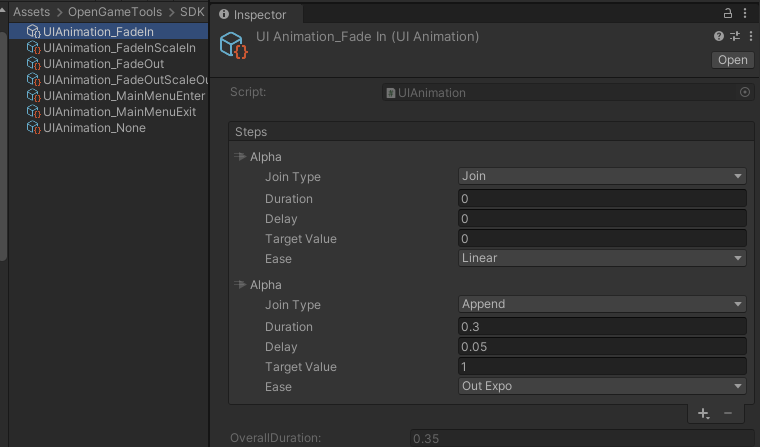 To customize this, just add and sort each step in the animation. 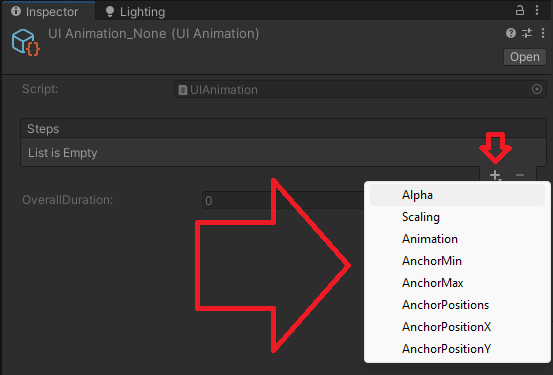 
Notice that this is the code for that window. You only need to worry about your logic.
using OGT;

public class ExampleWindow : UITabWindow
{
    [Header("Example Window")]
    [SerializeField] private TMP_Text m_title;
    [SerializeField] private TMP_Text m_message;

    protected override void OnInit()
    {
        base.OnInit();

        m_title.SetLocalizedText("My Custom Tab Window");
        m_message.SetLocalizedText("This window was created in runtime and is using UI Animations.");
    }
}
Random
UI Gradients, usable on any UI element, using TMP Gradients

Installation
- Make sure you have the
Assets/OpenGameToolsfolder in your game.
- In your initialization scene you might want to add the
GameRuntimeand theUIRuntimeprefabs, they will auto generate anyway, but to assure 100% reliability make sure they are somewhere.
-
Setup the UI:
Go to the
GameSettings, that you can access with the top MenuItemOGT/Module Resources/Select Settings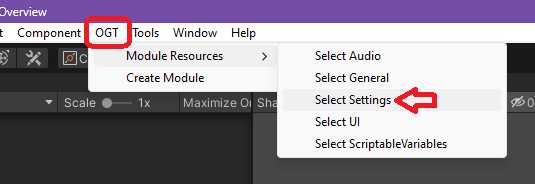
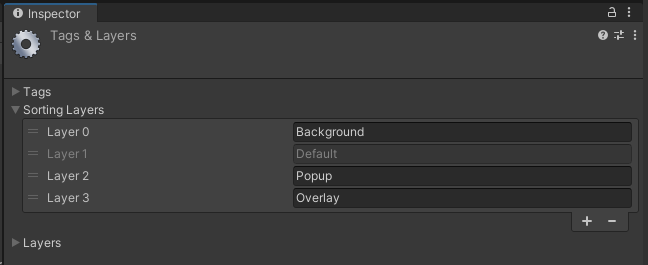
In here you can configure your desired Sorting Layers for the UI, we recommend the default values, you might want to add more.

These values must match the actual Sorting Layers, so make sure to add them.
- At this point you’re ready, but to harness the full potential of the asset, we recommend the following optional steps:
Optional and recommended:
- Add the
GameRuntimeprefab to your InitialScene or similar to ensure features such as Coroutine extensions.
-
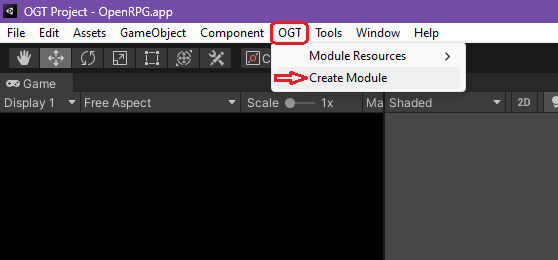
Create your own Module and move it outside the OpenGameTools folder, use that Module as a base for you to start extending the functionality.
You can do this easily with a few clicks.
Open the CreateModule window
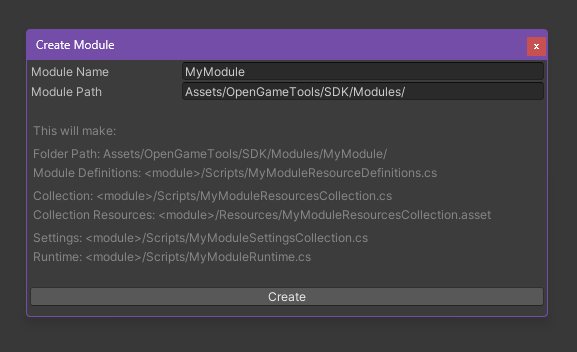
With this, you can have things like a separated file for Settings but keeping the actual data in the same ScriptableObject. This new module will have its own
MyModuleSettingsCollection.csthat might have new variables to use and you can find them in the same file from theSelect Settingsmenu item.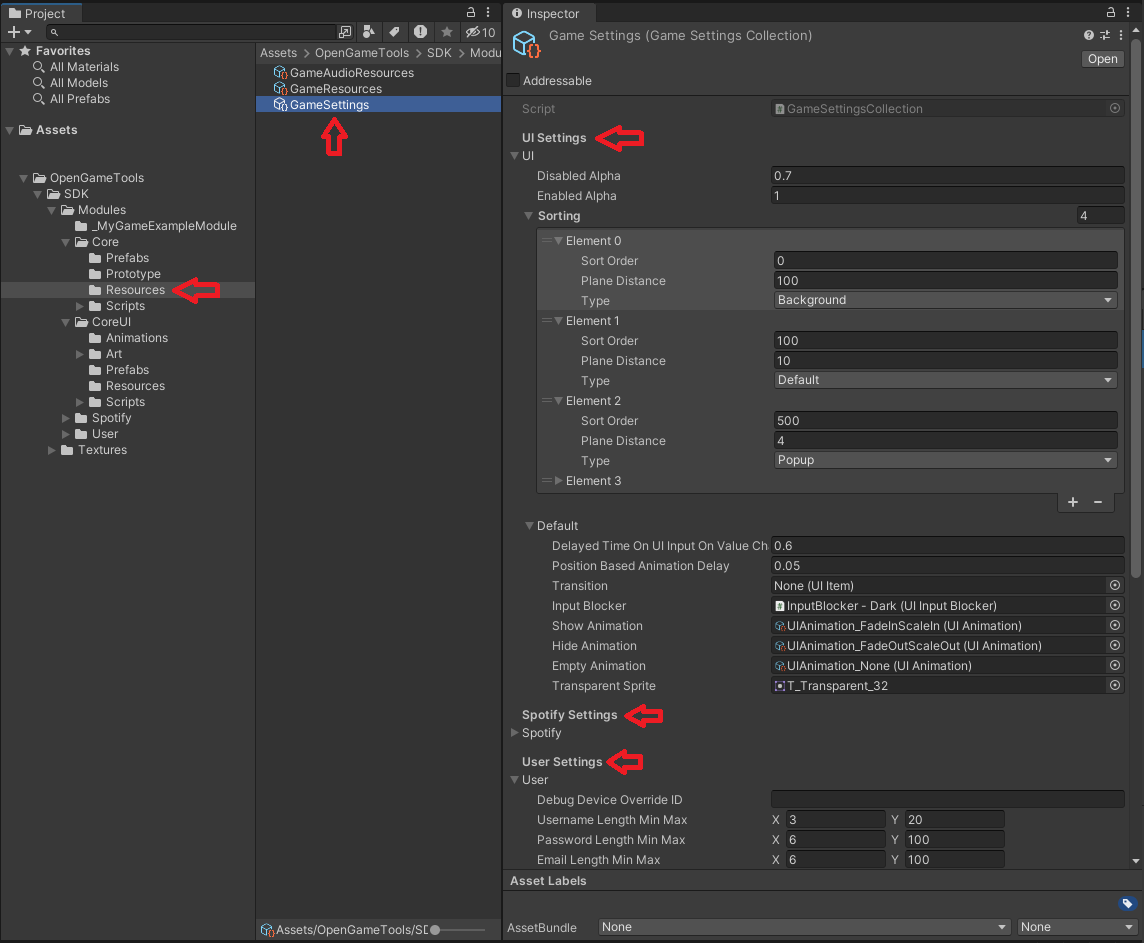
For example in the Image above, the
User,CoreUIandSpotify IntegrationModules are in the sameSettings Collectionbut keeping their code in the corresponding filesUISettingsCollection.cs,UserSettingsCollection.csandSpotifySettingsCollection.cs
-
Extend the
Base<>scripts as a parent behaviour for your scripts. For exampleBaseBehaviourinstead ofMonoBehaviour,BaseScriptableObjectinstead ofScriptableObjectand for any script that should be in UI, use any variation ofUIItem, checkUIItem.mdfor more info.public class MyScript : BaseBehaviour { /*...*/ }
Notes:
GameResources.csacts as a main definitions file in static constants. If you want to personalize your OGT feel free to do so. For example:kPluginName
Only
/Coreand/CoreUIare needed for the plugin to work, feel free to delete any otherModuleyou don’t need.